Pages

Showing posts with label lunch. Show all posts

Thursday, May 16, 2013

Be Prepared...for Health!

The new brown bag lunch.
Everybody's noticed by now: it's a food jungle out there. Fast, grabbable, not-so-healthy and even downright dangerous fare is always just a quick stop away. If you want to take care of yourself by eating well in this world, you have to be prepared.

One of the best ways to stay on top of your nutrition game is to bring your lunch to work. Taking along your own food keeps you in charge of what goes into your mouth, and of how you end up feeling in your body at the end of the day.

Clean, fresh food just feels better!

But being prepared takes...preparation! You can't bring your lunch to work if there's nothing in the fridge. That's why I recommend planning your daily food in advance. You can do this one day at a time, in chunks based on your next trip to the market, or for the whole week ahead. At the very least, figure out the night before what you plan to eat the following day. Write it down. Then do it!

Writing down your food ahead of time gives you a game plan. It's an especially useful tool for when you happen to stray away from the path of clean eating a little too far, or too long.

Figure out what you need to do to get your health, weight or digestion back on track. (This is where a call to your nutritionist might come in handy.) Maybe it's taking a break from grains, cutting out the dark chocolate or doing a little juice fast. Whatever you decide, write down what you plan to eat for the next few days. Writing it down makes it real.

You might want to include your exercise plans as well. Build them right into your schedule. Then, follow your program. And celebrate your success. Give yourself a gold star on the calendar for every day you love yourself healthy. Why not? Intention and planning take effort. Be proud of your achievements. You deserve to feel amazing!

Tuesday, November 8, 2011

Cleansing on the Job: Raw Food, Brown Bag Lunch


If you're interested in stretching your hard-earned dollars a little further, try bringing your lunch to work! "Brown bagging" is a tried-and-true way to conserve your financial resources on the job, not to mention your number one insurance policy for staying on track with your cleansing diet-lifestyle.

If you care about what you put into your body, preparing your own food always gives you the maximum control. No need to worry if those salad greens are organic, or if your salad dressing is made with high quality oil. You made it yourself!

You can step up the fun factor by using food storage and carrying containers that make you smile. Every day feels like a picnic when I bring my lunch to work in a willow basket. Here's what I'm looking forward to enjoying today. The green juice is for morning. I'll probably drink it around 10:00, when I start feeling hungry, and then have my lunch a little after noon.

1 pint Ginger Green Juice (celery, cucumber, romaine, kale, apple, lemon ginger)

Avocado Salad with mesclun greens, drizzled with lemon juice and MCT oil

Rainy Day Crackers (made fresh yesterday!)

Raw Tahini & Garlic Red Pepper Miso medley (for crackers)

baby carrots, to nibble on later

Tell me, dear readers, what are you bringing to work for your lunch today?

xo Diana

Tuesday, July 19, 2011

Pesto-Veggie Wraps with Vegan Hemp Seed Pesto


I’m so excited to be sharing a CSA share this year with my good neighbor Emily! Every Tuesday after work, I drive to the Kitchen Garden Farm in Sunderland and pick up a big green cardboard box pre-packed with beautiful, fresh-picked vegetables. Emily and I decided on a Deluxe Share which means we also get fruit, from a neighboring farm. The first week, our fruit consisted of two quarts of the sweetest organic strawberries we’d ever tasted. The next it was currants, then blackberries. Today we are getting gooseberries!


Even though I am splitting this CSA share, it's still a challenge to eat everything up in time for the next installment of bounty. So on Monday nights, it's time to make room for the incoming haul. For instance, say I was left with a generous portion of salad greens, radicchio and basil. Sounds like the perfect ingredients with which to make Pesto Veggie Wraps! If you ever find yourself in a similar situation, try this. Trust me, you'll be glad you did!


First, put together a nice raw salad with torn red leaf lettuce and radicchio, diced cucumber and dill.


Next, whip up a single-serving portion of Vegan Hemp Seed Pesto with the basil, garlic, olive oil and hemp seeds, plus some Himalayan pink salt (my favorite!). Spread the pesto inside of two cabbage leaves, layer on heaps of salad and add a generous squirt of fresh lemon juice. From there, it's just a matter of rolling… and voila!


In the absence of pesto fixings, I’d consider making Miso-Tahini Veggie Wraps or Salsa-Avocado Veggie Wraps or Honey-Almond Butter Veggie Wraps. The sweet, supple outer leaves of a freshly picked cabbage lend themselves to all manner of fillings.

One of my favorite things about this meal is the no-fork-required aspect. I absolutely LOVE salads, but let's face it, they can be tedious to plow through! Wrapping it up makes salad fun and easy to eat. Not to mention a mouthwatering delight. Enjoy!


Vegan Hemp Seed Pesto

Makes one serving

1 cup basil leaves, washed
1 small clove of garlic, minced
1.5 to 2 Tbs hemp seeds
1 to 2 Tbs olive oil
up to ¼ tsp sea salt, or to taste

In a food processor fitted with the S-blade, add basil, garlic, hemp seeds and sea salt and pulse until basil is finely chopped. Drizzle in olive oil while the processor is running. I use only enough oil to get the pesto to hold together and form a paste, stopping frequently and using a rubber spatula to bring everything down into the base. Taste and adjust seasonings. This would be good with a little crushed red pepper in it, too. Or some sundried tomatoes. Or a squeeze of lime juice. Or…!

Tuesday, April 5, 2011

Homemade Cilantro Hummus—In a Jiffy

Making school lunches has been part of my morning routine for, let's see, at least a dozen years now...so I've got it down to a science. An imperfect science at best. Actually, I should say it's more of an art. If not a downright scramble.

Okay, let me rephrase. Better yet, an example. Take this morning, for instance. Sprouted grain bread for assembling obligatory sandwich, check. Loaf in the freezer, however. Solution: pry off two frozen, stuck-together slices and lay on counter top to thaw.

Step two: decide what kind of sandwich to make. Today's options begin with raw almond butter and jam. But my son is starting tennis season and cutting down on sugars to get in shape, so he'd prefer a protein lunch. Option two...um, let's see what I've got here. If only I hadn't finished that container of hummus on Saturday....

Hummus! I can make that myself! It's like a revelation, which is funny, because I am old enough to remember a time when people always made their own hummus. It simply wasn't available in stores before Hot Mama's & Co. came to town.

And besides, hummus is super easy to make. All you need is a food processor (I'm not old enough to remember mashing the stuff by hand, thank you), chick peas, tahini, garlic and lemon juice (from fresh lemons or pre-squeezed). Today, I had it all, plus cilantro!

So there I am at 6:30 in the morning, whipping up hummus. I hope Zack likes it since, I confess, I only took a few small "I haven't even had my tea yet" tastes, although the smell is terrific. By the time the hummus was made, the bread was thawed enough to separate into two slices. Spread one with hummus, the other with Garlic Red Pepper Miso, fill with fresh alfalfa sprouts, snuggle into a baggie and we have one tasty sandwich to go. Add to lunch box along with fresh fruit, organic yogurt, Rice Milk and a chocolate protein bar for pre-practice snack and there's school lunch... in plenty of time to catch the bus.

Now, about that tea...!

Homemade Hummus with Fresh Cilantro

1 can (15 oz) chick peas, drained and rinsed
2 tablespoons tahini, raw or roasted
Juice of 1 lemon, about 2-4 Tablespoons
1 clove garlic, minced
salt or Herbamare to taste
small bunch of fresh cilantro stems, minced, (about 1/4 cup)
water as needed to facilitate processing

Add chick peas, tahini, lemon juice and garlic to food processor and pulse till well blended. Add water or additional lemon juice as needed to smooth the processing or hummus will be too dry, especially if using raw tahini (which is less oily than roasted tahini). Add salt or Herbamare (that's what I used - delicious!), pulse again and taste. When satisfied with salt level, add the chopped cilantro stems and pulse them in gently, so they retain their individuality. You could also use cilantro leaves, but since they are prized more greatly as a garnish and in salads, I found this was a good use for the stems. The humble stems still taste wholly cilantro-y and I always add them into soups, beans, etc, saving the leaves for topping.

Thursday, March 24, 2011

Practically Raw Sprouted Corn Tostadas

Here's something very delicious to make for lunch that whips up in a jiffy and features a brand NEW! product I tried for the first time today: organic Sprouted Corn Tortillas from the Food For Life Baking Company (makers of Ezekiel bread, sprouted grain bagels, sprouted whole wheat tortillas, etc.)

Sprouted grain products are valued for many reasons. Grains are seeds and when they are sprouted, their nutritional value often goes up. The sprouting process initiates the breakdown of protein and carbohydrate compounds in the grains, releasing bound amino acid and sugar components and freeing up nutrients. In this sense, sprouted grains are essentially "pre-digested," to a degree. Another benefit of sprouting is that natural anti-nutrients in grains, such as phytates and protease enzyme inhibitors, are also broken down and degraded in the sprouting process. Finally, sprouting makes grains more alkaline, helping them to favor a preferential pH balance in the body.

All soaked and sprouted grains, as well as sprouted beans and seeds, will offer the above benefits. Sprouting, however, does not remove gluten, a gluey protein that is found in wheat, spelt, rye, and barley. Gluten sensitivity is a rising problem around the world with an estimated 30-40% of people affected. Any food which is made from wheat or any gluten-containing grain, even healthy sprouted Ezekiel bread, still contains gluten.

Corn, on the other hand, is a gluten-free grain. Some people are allergic to corn, but gluten intolerance is not linked to corn allergies, so having a sensitivity to one does not implicate the other. Corn is an ancient New World grain that was sacred to American Indian tribes. Although modern corn has been abused in many ways by agribusiness and industrial development, corn itself is still a high value food, especially when it is organic corn grown in nutrient-rich soils and free of genetically modified organisms.

Delicious Food for Life Sprouted Corn Tortillas are made with only four ingredients: organic sprouted corn, filtered water, sea salt and lime. According to the company, after the corn is sprouted it is ground and mixed with the other ingredients to form a masa, or traditional thick dough, which is then rolled and flattened into characteristic tortilla shapes. The tortillas are baked at low temperatures (250 degrees) before packaging. Each tortilla provides 60 calories of whole grain carbohydrate energy and only 1 gram of fat, plus a little calcium and iron. The flavor and texture is naturally corn-sweet, wholesome, chewy and far moister than some gluten-free tortillas I've tried that crumble when folded.

I forsee this product becoming a new staple in my kitchen and am pleased to be sharing it with you today. I looking forward to creating sprouted corn tostadas with avocadoes and cilantro, with black beans, with tofu-miso paté... but for today, let us begin with hummus, the humble and widely available Middle Eastern sesame-chick pea spread. I used Hot Mama's original flavor hummus in this recipe, but any brand or flavor, including your own homemade raw or cooked hummus, would surely be tasty and satisfying.

Practically Raw Sprouted Corn Tostadas
with Hummus, Salsa & Sprouts


2 sprouted corn tortillas
1/4 cup hummus, your pick of flavor
1 cup alfalfa or red clover sprouts
2 teaspoons salsa
2 black olives

Warm tortillas briefly in the toaster or on the surface of a hot, cast-iron skillet for about 30 seconds to gently soften. Transfer to plate and divide hummus evenly between the two tortillas, spreading out almost to the edges. Top each tostada with half the sprouts, half the salsa and one black olive. To eat, spread the salsa across the center line and fold the tostada in half, like a soft taco. Then, bite in. Yum!

Note: I purchased my sprouted corn tortillas at Green Fields Market in Greenfield, MA and did not receive any product or compensation from Food for Life Baking Company prior to posting this blog. However, Food for Life is welcome to send me free samples and coupons anytime, as I adore their products!

Saturday, January 15, 2011

Practically Raw Baked Potato Salad


Are you planning on baking potatoes any time soon? If so, cook a few extras and use them to make this Practically Raw Potato Salad.

Practically Raw is my fun little way of saying two things: 1) containing a high percentage of raw food, and 2) a raw or raw-based recipe that is simple and practical to prepare. (Stay tuned for my Eat to Evolve Practically Raw Recipes E-Book coming this year!!)

This Practically Raw recipe relies on a pre-baked organic potato. I happened to have an organic baked Yukon Gold potato on hand, but feel free to use any organic baked potato you like (such as red, or even blue or purple potato, if you want to get fancy). I suggest you stay away from Russet and Idaho varieties as a rule, as they are a) too dry and b) too starchy for optimum carb healthyness. Red, blue and gold potatoes are more nutritious, moist and delicious!

Aside from the potato, everything else in the recipe (except the mustard) is raw and/or alive. For instance, instead of mayonnaise, I use mashed avocado and lemon juice, a brilliant idea I gleaned from a fellow Detox Community member over at detoxtheworld.com (that's Natalia Rose's awesome website, fyi). Avocado combines as a starch so its a perfect addition to potato salad. Just mash avocado with lemon juice and add miso and mustard for a tasty, creamy dressing.


Next, add a few handfulls of colorful veggies to the avocado mayonnaise. It's a rainbow for your tummy.


Finally, stir in the diced baked potato. Note: it was easy to peel the skin off the baked potato so I did, but you could leave it on if you prefer.


Here is the recipe I used in its entirety. Feel free to improvise with whatever raw veggies you happen to have on hand... to make this baked potato salad even more practically raw! :)

Practically Raw Baked Potato Salad

1 good sized organic baked potato, sliced and diced
juice of 1/2 lemon
1/2 ripe avocado
1/4 to 1/2 red bell pepper, minced
1/4 bunch cilantro, chopped (a big handful, basically)
1/4 red onion, minced
1 teaspoon miso
1 teaspoon mustard (i used whole grain but dijon would be good, too)

Directions
Mash the avocado with lemon juice, then stir in mustard and miso. Mix this with the red pepper, red onion and cilantro, saving a little minced pepper or cilantro for garnish. Add chopped potato and gently stir everything together. Garnish and enjoy! Serves one as a stand alone meal, two as a side with green salad.

Monday, December 27, 2010

Blizzard Plate Special Salad with Parsley-Macadamia Nut-Pumpkin Seed Paté & Sprouted Seed Crackers

The first snowstorm of the season is blowing outside, windy, white and cold. When it comes to lunch, this means only one thing: a hearty salad plate.

My salads always start with a big, fluffy bed of greens. In this case, I used a blend of 50% chopped romaine, my favorite winter lettuce, and 50% baby mesclun greens. Chopped avocado, tomato and red (Bermuda) onion are added next, with a generous squeeze of fresh lime juice on top for the brightest and simplest of dressings.

On the side, you'll see a scoop of my delicious Parsley-Macadamia Nut-Pumpkin Seed Paté (recipe to follow) surrounded by two flavors of Sprouted Seed Crackers. I made these in the dehydrator with a dough formed from soaked and sprouted buckwheat, flax and sunflower seeds that I ground and combined with assorted seasonings. The exact recipe is top secret, but you can come close with my Rainy Day Crackers.

Even though it is cold outside, our bodies still crave fresh living foods. Use good strong greens, warming onions or garlic, and a topping of healthy fats and proteins (in this case from avocados and nuts/seeds... but you could also consider black beans or chickpeas, kalamata olives, sardines, etc) to make nourishing winter salads that both satisfy and appeal. Bon appetit!


Parsley-Macadamia Nut-Pumpkin Seed Paté

1 cup raw pumpkin seeds, soaked 2-4 hours and drained
1/2 cup raw macadamia nuts
1 clove garlic
1 1/2 teaspoons sea salt
1 lemon's juice (about 1/4 cup)
3 Tbs cold-pressed raw olive oil
1 tsp raw coconut oil
1/2 cup chopped fresh parsley (about 3 stalks)
black pepper to taste
about 1/4 cup water, more or less as needed

Directions
In a food processor, process pumpkin seeds, macadamia nuts and sea salt into a fine meal. Add lemon juice and oils and begin processing again, drizzling in water until the mass gets rolling. Continue processing for a few minutes, stopping as needed to spatula down the sides, and allow it to keep going until very creamy. At that point, add fresh black pepper and chopped parsley and pulse process for about half a minute or until well blended. Store paté in a covered glass jar or container in the refrigerator. Makes 2 cups (one pint) and keeps for up to a week. Or, divide into portions and freeze what you won't use in a week. This paté freezes really well by keeping its consistency after thawing, making it quite handy to grab and bring to a raw food pot luck in a pinch. (True story.)

Wednesday, December 15, 2010

Ginger Beet Borscht

Mmmm good: spicy ginger & sweet beets united as one!

Isn't it true that as the temperature outside gets colder and colder (a measly 2 degrees here this morning)... warm, comforting soups become more and more appealing? And what could be more appealing than an easy to prepare, thick and creamy blended soup?

Lately, I've been whipping up all manner of delicious bisques, purees and potages simply by combining leftover cooked veggies with either their own saved cooking liquid or some vegetable broth, and adding additional raw veggies and/or seasonings as inspiration moves me.

This tasty borscht is made with leftover roasted beets. I'll often roast a few days worth of beets at a time to eat with avocado or goat cheese salads and other meals throughout the week. Blending up roasted beets into a smooth, warming soup is something I hadn't tried before, and I was most pleased with the results.

The irresistibly sweet, succulent beet is a light yet hearty root vegetable, rich in health-promoting betaine, a red pigment that helps boost liver detox and support heart health.


Fresh ginger, a premier inflammation buster, is a perfect flavor complement to the beet and makes this soup extra warming and satisfying. Raw garlic adds some zing while boosting the immune system with cancer fighting allicins.


Tender baby spinach, brimming with green life force, is high in bone-building calcium and blood-building iron.


Seitenbacher's vegetable broth powder is one of my favorite instant flavorizers—love it!


To make Ginger Beet Borscht, just pop all of the above in your blender and go! Feel free to add water or broth as needed to achieve desired consistency. I started with one cup of water and increased to about two and a half cups before finding the right balance of liquid to thickness.


Total yield: about 4 cups or 2 large bowls of sweet, ruby deep nourishment!


Ginger Beet Borscht

Ingredients
3 medium roasted beets
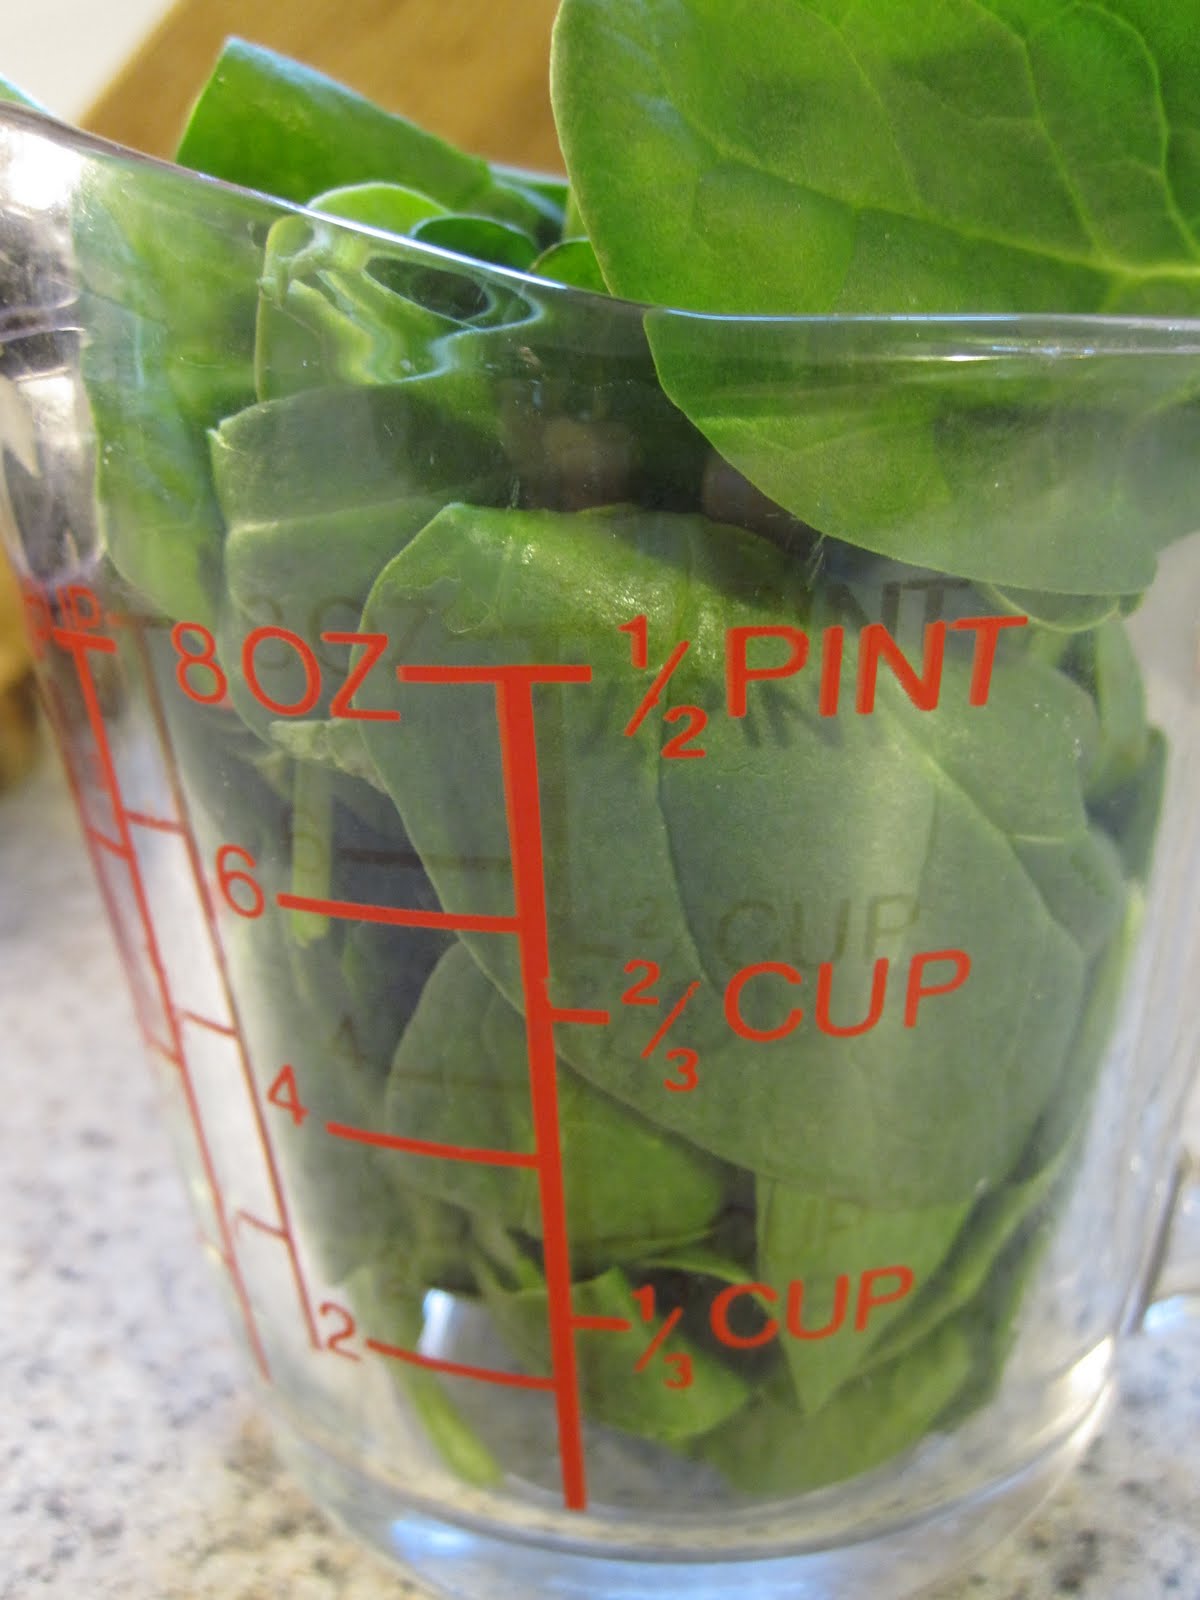
1 cup packed fresh, raw baby spinach
1 clove garlic
1 chunk of ginger, a little smaller than your thumb
1-2 cups of warm vegetable broth or warm water (if using water, add 1 teaspoon powdered veggie broth, or to taste)

garnish:
freshly ground black pepper
hemp seeds or crumbled, savory Kale Krisps

Directions
To roast beets, scrub well and remove tops and tails. Put a little olive oil in your palm and take each beet into your hand, one at a time, to lightly coat with oil. Put beets into a cast iron frying pan or pyrex baking dish and cover loosely with foil, or wrap each beet individually in foil. Roast at 400 degrees for about 2 hours until fork tender. Remove from oven and allow to cool. At this point, you may pop the inner beet out of the skin or keep the skin on if you prefer. The earthy taste of beet skins is a bit too strong for some palates, but skins may be eaten with no ill effects if they appeal.

To make soup, put roasted beets, garlic, ginger, spinach and water or broth into your high speed blender and blend until smooth. The soup will be warm at this point, but if desired, warm further to about 100 degrees on stove top. As long as the temperature remains below 118 degrees, the enzyme and life force activity of raw ingredients will remain intact.

Divide into bowls and top with freshly ground black pepper plus a sprinkle of hemp seeds (photo above) or crumbled Kale Krisps (photo below). Kale Krisps are a scrumptious dehydrated raw kale treat. Purchase at Whole Foods (or, if you are a local reader, from me, for less! Community Superfoods price: just $6.50 per 3 ounce package!)

Friday, August 13, 2010

Chilled Cream of Corn and Cucumber Bisque with Fresh Thyme


No one can say we didn't get a real summer this year. Unlike last year's Summer That Never Was (one of the wettest on record), the summer of 2010 has been hot, hot, hot! And sunny, sunny, sunny! I'm all about heat and sun, but I admit the urge to spend time in the kitchen prepping food is strongly diminished by uncomfortable levels of humidity.

Once again, thank goodness for blenders! In this weather, the Vita-Mix has to be my top used kitchen tool. Not only can it whip up a colorful and refreshing smoothie - also known as "breakfast of champions" - in record time, it's unbeatable for creating quick and easy raw blended soups that really hit the spot when you're hungry and hot.

Here’s a delicious, sun-golden summertime soup that makes a perfect light lunch or a sweet prelude to dinner on even the steamiest of days.

The recipe owes its ultra-creamy taste and texture to a special addition: Kristen Suzanne’s Cheezy Hemp Nacho Sauce, one of my favorite all-time delicacies. (link below) I happened to have some left over from a previous meal, (cheezy spiralized zucchini & summer squash noodles). Here, it supplies a savory cream base to a sweet chilled soup. Juicy cucumber provides the liquid and fresh thyme adds unexpected depth with a peppery bite. I hope you like it!

Chilled Cream of Corn and Cucumber Bisque with Fresh Thyme
Makes two appetizer bowls or one meal-sized bowl of soup.

Ingredients
1-2 large organic cucumbers, peeled and diced - yielding 2 1/2 cups
1 ear organic sweet corn, kernels removed
½ cup Cheezy Hemp Nacho Sauce (click here for recipe)
1 Tablespoon fresh thyme leaves (or 1 teaspoon dried thyme)
cayenne pepper to taste (optional)

Directions
Add cucumbers, Cheezy Hemp Nacho Sauce and corn kernels to a high speed blender and puree on high speed. Add thyme and repeat briefly. Transfer soup into serving bowls and sprinkle with cayenne, if desired. Bon appetit!

Tuesday, December 15, 2009

Raw Tostadas with Cheezy Hemp Nacho Sauce


As much as I love preparing raw food and delving into recipe books for inspiration, it’s rare that I follow a recipe to the letter. But there’s always that rare exception to the rule, and I humbly offer one here.

Kristen Suzanne’s Cheezy Hemp Nacho Sauce is, in a word, Perfect! I made it for the first time today and, truth be told, I found myself really, really wishing that I could unscrew the bottom of my Vita Mix to get every last drop into my greedy little mouth. MMM-MMM-Amazing is all I can say.

This sauce tastes a lot like a Mexican Salsa con Queso. But instead of goopy, mucusy cow cheese, it’s made with clean-burning, highly digestible hemp seeds!

Hemp seeds are one of my favorite vegetarian food protein sources. Besides tasting incredibly creamy and sweet and nutty all at the same time, hemp seeds are a whole food offering an ideal balance of beneficial essential omega-3 and omega-6 fatty acids. They also boast a complete, well-rounded amino acid profile, providing 25% protein by weight. Additionally, tasty hemp seeds are rich in fiber, contain plenty of critical minerals like zinc, iron, calcium and magnesium and are a good source of antioxidant vitamins A and E.

Cheezy Hemp Nacho Sauce is not only nutritious and delicious but versatile, offering a variety of serving possibilities. It makes a great dip with raw veggies or raw chips, is sure to be incredible on top of zucchini noodles (I intend to prove this very soon!) and makes a superior nacho sauce, natch.

Come lunchtime today, I was fortunate to have some homemade chia tortilla shells in the fridge, along with a nice variety of fresh, bitter winter salad greens picked at the CSA last week. I warmed the shells in the toaster, chopped the greens, whipped up the sauce and voila! These delectable Raw Tostadas were born.

I made them two ways: 1) sauce on top of the greens (pictured on the red plate), and 2) sauce under the greens, with Herbamare-kissed avocado slices on top (plated on blue). Both were divine, as you might imagine from the photos.
No dehydrated tortillas on hand? Consider a simple wrap-style tostada instead, using nori sheets, romaine lettuce or collard greens to encase the sauce plus greens or any veggies of your choice. It's all good.

Kristen Suzanne’s
Cheezy Hemp Nacho Sauce

Add the following ingredients to high speed blender and blend until creamy.

1/3 cup water
1 clove garlic
2 tablespoons fresh lemon juice
1 chopped red bell pepper
1 cup hemp seeds
2 ½ Tbs nutritional yeast flakes
1 Tbs chili powder
2 tsps tamari
½ tsp Himalayan crystal salt
½ tsp garlic powder
½ tsp cayenne pepper
1/8 tsp turmeric powder

So easy! So tasty! Happy munching! And be sure to visit Kristin's blog for more yummy recipe ideas and high raw inspiration.

Tuesday, May 12, 2009

I Love My Lunch

My mother finds it very strange that I take pictures of my food. But I can't help it!

For me, creating beautiful dishes and loving how my food looks is one of the great pleasures of following a high-raw diet. So naturally, I want a record of each culinary masterpiece. Of course, photos (especially those taken with my old point & shoot) can only begin to capture a suggestion of the life force emanating from my living cuisine. Hopefully, you get the idea.

Today's delightful lunch features open-faced sandwiches made with Carrot-Coconut Flaxseed Crackers (see previous post for recipe). Each crisp, buttery cracker is spread with a mixture of raw tahini and sweet white miso (about half and half), then topped with sliced organic roma tomatoes, homegrown French lentil sprouts and a drizzle of my own raw apple cider vinegar-olive oil vinaigrette. The plate is garnished with a giant purple asparagus stalk, courtesy of Brook Bend Farm, where I have the good fortune of working this summer in exchange for farm-fresh organic produce.

Wish you could join me...bon appetit!

Thursday, April 2, 2009

Parsley Pumpkin Seed Paté Roll-Ups

As a follow-up to my last blog on the Properly Combined Sandwich where I discussed how we don't want to eat bread (starch) and protein at the same meal, I thought I'd share a yummy and fun sandwich-like protein-combo lunch meal: nori roll-ups with a delicious filling of rich, savory seed cheese (protein) and chopped salad. Earlier today, a client was curious about how to make both seed cheese and nori rolls, so I decided to post a little step-by-step excursion here. You'll find the recipe for Parsley Pumpkin Seed Paté at the end.

Learning to make soaked seed/nut "cheeses" and patés is one of the best culinary steps I ever made. Since seeds are easier to digest, less expensive and less allergenic than most tree nuts, I like to focus on them. Soaked raw seeds and nuts offer the advantage of activated enzymes that initiate the breakdown of nut/seed proteins into amino acids (pre-digestion). As a bonus, they move through the body far more quickly than plain unsoaked seeds/nuts, nut butters and hummus or bean spreads. The spreads I make taste different every time depending on what seeds or nuts and seasonings I use, and are always fabulously satisfying.

To make Parsley Pumpkin Seed Paté Roll-Ups, first prepare your paté (easy recipe below) and your chopped salad, lightly dressed. My salad contained romaine, baby spinach, roma tomato and fresh garlic, all chopped and tossed with a tasty dressing of balsamic vinegar, mustard, novella olive oil, sea salt, agave and herbs.

Note: the packet of 50 nori sheets pictured above was purchased for only $7.99 at my wonderful local Asian/World food market. Sadly, the same sheets cost significantly more at the health food store. Many communities harbor these treasure trove Asian food stores - I am very grateful for mine. (This is where I learned from a master how to open a young coconut. Very easy once you know the secret!)

Step One: Lay nori sheet flat and spread a line of pumpkin seed cheese along the base (left/lower roll below). Leave room at the sides as contents will smush outward when you roll up. (FYI, you could lay out thick slices of avocado instead of seed paté - but not avocado and nuts/seeds in the same roll, please - too heavy!)


Step Two: Add a few spoonfuls of chopped salad (upper roll above), again keeping the one inch at each end free of filling.

Step Three: Stand behind the filling side of the roll and start rolling! (Don't worry about perfection, a few lumps are not a problem and after a little practice, you'll be an expert.) Just before you get to the end, dip your finger in cold water and wet the top edge of the sheet to help seal, then finish the roll.

Step Four: Plate, add raw veggie garnishes* and voila! Lunch is served. Bon appetit!


Parsley Pumpkin Seed Paté

1 cup raw pumpkin seeds, soaked 2-4 hours and drained
1/2 cup pine nuts
1 clove garlic
1 1/2 teaspoons sea salt
1 lemon's juice
3 Tbs cold-pressed raw olive oil
1 tsp raw coconut oil (optional)
1/2 cup chopped fresh parsley (about 3 stalks)
black pepper to taste
about 1/4 cup water, more or less as needed

Place pumpkin seeds, pine nuts, garlic and sea salt in food processor, then pulse and process with S blade into a fine meal consistency. Add lemon juice and oils and begin to process. As needed, add just enough water to help get things rolling smoothly. Process for several minutes until very well combined and creamy, pausing from time to time and using a spatula to bring everything down into the center until it really catches. When the paté is very creamy and seems finished, add parsley and black pepper and pulse-process until mixed through. Store refrigerated, either in a container to use as spread or, if you want to be fancy, as a log, like chevre. (To do this, use clean hands and shape into log form; roll in additional parsley or black pepper if desired; wrap in waxed paper or plastic film.) Keeps up to 5 days.

* One summer long ago, I worked at Friendly's as a waitress. Part of my job was to garnish the plates with pickles and parsley before taking them out to the customers. "Don't forget your pickles and parsley!" was the rallying cry of my manager. Of course, we would only use a tiny sprig of parsley, but I remember thinking how that brave little sprig, the only living thing on the plate, was no doubt the healthiest item on the menu.

Monday, March 30, 2009

The Properly Combined Sandwich

I adore fresh salads and generally rely upon them as my midday meal of choice. But sometimes I get tired of eating salad every afternoon, simply because I want to take a break from using utensils! In such cases, I want my salad to be somehow contained in a neat tidy package, so I can pick it up and just bite in with freedom and abandon. What I really want is... a sandwich!

Of course, sandwiches are usually made with bread, a food item that rarely appears in my dietary repertoire. This is why I love the Veggie Wrap concept. Any salad combo can be rolled into a nori sheet or large green leaf (think cabbage, collard or romaine) to create a satisfying sandwich sub.

Typically when I don't want the salad in a bowl, I wrap it up this way. But there are days when I crave something more substantial to accompany my fresh raw greens, something chewy and grainy...hmmm. What could that be? Bread, perhaps?

We all know that a standard sandwich involves bread plus a protein filling, say peanut butter, cheese or meat. The problem here is that, as explained in an earlier post, eating bread with protein is a no-no. Starches don't combine well with proteins due to the conflicting types of digestive enzyme environments they require (alkaline for starches, acid for proteins). Eating them together overburdens the digestive system, saps your energy for hours to follow and can lead to gas, bloating and weight gain. The best thing to combine with starches (or proteins, for that matter) is vegetables alone. So what's a lunchtime sandwich craver to do?

Enter the Properly Combined Sandwich (PCS). Basically, this is simply a raw vegetable sandwich on whole grain bread with condiments and avocado, if desired. (The veggies are usually raw but you can use cooked veggies as well from time to time.) To my knowledge, the official PCS title was coined by Harvey Diamond, a natural hygiene proponent, in his bestselling 1985 book Fit for Life. You'll see it used by many others as well, because, well, the concept is here to stay!

So. To create a Properly Combined Sandwich, start with the highest quality 100% sprouted grain bread or 100% whole spelt bread (or wraps) available. Perhaps your local natural bakery can be of service here. If not, both the Alvarado Street Bakery and Food for Life companies make tasty sprouted grain breads, bagels and tortillas that may be found in the freezer section of many grocery stores across the country.

Next, consider fillings. While raw veggies like tomato, lettuce, sprouts are famous typical sandwich supporting players, in the Properly Combined Sandwich they earn starring roles. And top billing goes to that most creamy and delectable of starch-friendly vegetable-fruits, the avocado. (I eat avocados every day I can get my hands on them - they are one of my favorite foods...)

Condiments like stone ground or dijon mustard, organic salsa and miso can also be important features in the Properly Combined Sandwich. Spread a little mustard on your sprouted grain bread, add a layer of sliced avocado and pile high with veggies of your choice: spinach, lettuce, mushrooms, tomato, sprouts, grated carrot, chopped garlic, parsley, red onion, cilantro - the sky's the limit.

I recommend eating one or two open faced sandwiches rather than a single two-slice number to maximize your raw veggie intake. Place a flat leaf of lettuce on top if you need something to hold onto. Alternatively, toss a raw salad with your favorite dressing, add avocado and spoon into a sprouted grain tortilla lightly spread with mellow white miso. Roll, wrap and eat - incredible! Or fill a corn tortilla with chopped lettuce, avocado, green onion and salsa to create a soft taco style sandwich.

A Properly Combined Sandwich is fresh, colorful and delicious. Best of all, it digests beautifully, so it won't cause you to bloat up or gain excess weight. In fact, you may even lose weight eating this way. And with so many veggies to use for fillings, the Properly Combined Sandwich never gets boring! Just remember to save any dense protein items (hummus, raw goat cheese, almond butter) for your starch-free green leaf and nori wraps.

Saturday, March 7, 2009

Almost Spring Salad with Crimini Mushrooms, Avocado and Cilantro

March is staying true to form this year, coming in like a proud lioness. I'd say this first week of consistently-below-freezing temperatures has succeeded in keeping most of us well-chilled! But despite the lack of heat outside, our bodies still crave freshness. As much as I don't want to put anything cold into my body, I can feel my cells crying out for raw and living food. After all, raw food is their natural, high vibration preferred fuel. Fortunately, not all raw food has to be cold, and that goes for salads, too. This simple winter salad provides the salty meatiness of shoyu-kissed crimini mushrooms, the creamy comfort of spiked avocado, the sweet zip of cilantro and the hearty scrub factor of strong-leafed lettuce. Prepare with room temperature ingredients to keep your fingers nimble.

Almost Spring Salad

Green Leaf Lettuce - several leaves
Cilantro - 1/4 bunch or to taste
Crimini Mushrooms - 1/2 package
Avocado - 1/2 to one whole
Nama Shoyu (or equivalent), Balsamic Vinegar (or equivalent), Olive Oil, Spike or Sea Salt

Wash and tear as many green lettuce leaves as you want to eat, and add them to your favorite salad bowl.
Roughly chop about half a package of crimini mushrooms, put them on top of the lettuce and sprinkle with nama shoyu, tamari or Bragg's liquid aminos.
Halve an avocado and slice one half into cubes (use the whole thing if you are really hungry or it is a small avo). Put avocado cubes on top of the mushrooms and sprinkle with Spike (surprisingly great on avocado!) or your favorite sea salt.
Mince a good sized handful of cilantro stalks (stem and leaves) and put on top.
Shake some balsamic vinegar over the whole thing (or if you prefer, use apple cider vinegar, lemon or lime juice) and drizzle with high quality olive oil. (I used an incredible Italian Novella oil that I just discovered. It's made from the first pressing of this season's coming harvest and is out of this world–so alive, it continues to decant and ripen in the bottle! Note: Local readers can find Novella olive oil at Cooks Shop Here in Northampton.)

Finally, toss, admire and EAT! Your body will love you for it. Promise.

In joyful anticipation of the Equinox,
Diana

Tuesday, February 24, 2009

Practically Raw in Winter


Hey baby, it’s (still) cold outside! Here in Western Massachusetts, late February marks the beginning of the end of the iciest two months of the year. For me, by this point in time the cold has seeped so far down into my bones it’s hard to really, truly warm up. Often, the only way to dispel the deep chill is to submerge myself in a hot bath or hop on the mini-tramp for a vigorous rebounding session. These methods both work wonders, provided the timing is right. When it isn’t, there’s always soup.

Everybody knows a steaming bowl of hot, savory soup is quintessential warming winter fare…especially when garlic and onions are involved. In fact, the idea of going without basic warming foods like soup has dampened many an earnest health seeker’s desire to consider giving the raw food detox lifestyle a try.

This is why it’s so important to understand that “being raw” is not the goal of cleansing! The goal is to enjoy the highest states of physical health and alert, energized awareness. Such states can only be achieved when we cleanse and nourish the body with the highest quality, high vibration foods.

Eating heavy, dense foods (animal flesh, cooked beans, nuts, etc.) requires a lot of work, sometimes for several days, on the part of the entire digestive system – from gut to liver to colon. This work slows us down, interferes with the natural flow of energy in our bodies and creates waste that must be eliminated or stored. Conversely, eating light, water-rich plant foods cause no such interference, supports the release of old stored waste from body cells and tissues and enables us to vibrate at our naturally high energetic level.

In other words, a cleansing diet based on fresh, whole raw foods can help us to clear out the food waste and toxins stored in cells and tissues over a lifetime, opening up our bio-electric channels to the free flow of life force energy. Raw foods are critical in this pursuit, but for most of us, especially those new to cleansing, it is equally important to consume high quality cooked foods.

When too many toxins are released into the system due to the overzealous consumption of raw foods, the body can become overwhelmed with poisons. Without giving the body sufficient time and opportunity to eliminate these wastes from the organism, “cleansing” can turn into “autointoxication” and become counterproductive.

Eating cooked vegetables (and fruits) helps to slow down the cleansing stimulated by raw foods without adding to the overall body burden. This allows the eliminative pathways to remove the wastes that are released into the bloodstream as a result of dietary cleansing.

Remember, the cleanest and most detox-stimulating foods are raw fruits, raw veggies and their freshly pressed juices. The next cleanest foods are whole, simply cooked vegetables – prepared by steaming, braising or baking. Rather than a stimulating effect, simply cooked vegetables have a somewhat neutral effect on the body. They pass through the digestive tract quickly and leave no waste behind, providing comfort, satisfaction and nourishment while allowing the body to attend to other needs such as assimilation, repair and elimination of wastes.

When it comes to a long-term cleansing lifestyle, clean food is more important than raw food. With this in mind, let’s talk about warming winter fare. Humans would not have ventured into cold climates without the accompaniment of fire and cooking. Today we live in heated homes with refrigerators and have grocery systems that allow us to enjoy fresh raw food year-round. But that doesn’t mean we want to eat nothing but cold salads all winter, nor should we force ourselves to do so.

If you love soup in winter, take heart! Get comfortable with being practically raw and you can have your soup and eat it too.


Practically Raw Miso Soup

This quick and flexible recipe can be made with whatever you have on hand for veggies. Because the vegetables are added to hot broth and essentially warmed through rather than cooked for any length of time (hence Practically Raw), their high nutrient and enzyme content is maintained. Just be sure to slice everything thinly so that veggies will warm through enough to soften when added to the hot broth.

NOTE: One of my favorite hobbies is to visit Asian food markets and pick up unusual (to me) ingredients: jars of curry pastes and seasonings, packages of seaweeds, fresh young coconuts and other exotic items. On one such visit I was fortunate to find a Thai seasoning called “Instant Seafoods Clear Soup Paste.” This secret ingredient contains chili, lemon grass, lemon juice, shallot, sweet basil leaves, sugar, salt and citric acid and adds a complex and intriguing taste to any soup – no seafood required!

Makes 2 gigantic or 4 average sized bowls of delicious, savory soup.

½ large onion, diced
1 large carrot, thinly sliced
1 celery rib, thinly sliced
½ package of baby bella (or other) mushrooms, chopped
1 medium zucchini, spiralized into noodles
½ red bell pepper, diced
2 cloves of garlic, minced
½ inch ginger, peeled and grated (optional)
1 Tablespoon miso (barley is nice)
1 teaspoon powdered vegetable broth
1 teaspoon “Instant Seafoods Clear Soup Paste” (optional)
black pepper or cayenne pepper to taste, if more hotness desired

Simmer onion in 2 cups of water for about 15 minutes. While the onion is simmering, prepare vegetables and set aside in a large bowl. (It’s a good idea to start with room temperature veggies if possible, since this is meant to be a warming meal from the prep to the eating.) If you don’t have a spiral slicer for the zucchini, you can use a vegetable peeler to make fettuccini-like strands or simply slice into long thin strips.

Once veggies are chopped and broth is done simmering, remove pan from heat. In a small dish, make a paste with miso, “Instant Seafoods Clear Soup Paste” (if using) and a little warm broth. Add paste back into pot of broth along with bouillon powder and stir to combine. To this seasoned broth, add all the sliced veggies and pepper if using. Stir to mix and allow to sit for a minute or two while veggies warm up and absorb flavors of broth. Taste, adjust seasonings if needed, ladle soup into bowls and enjoy!

Tuesday, June 24, 2008

Play in the Kitchen!


Did anyone ever tell you not to play with your food? If so, you may share a commonly held belief that preparing natural, healthy and raw food is a lot of work. But is it? I am here to suggest otherwise!

Eleven amazing people attended my talk last week on the New Raw Food Diet. More than half the group were already following raw or high raw diets and had wonderful insights and experiences to share, while the remaining attendees, introduced for the first time to the exciting world of living foods, were so open to learning. It was an honor to facilitate this meeting of our growing raw food community and I hope we will develop and expand our connections through future meetings and workshops.

One concern voiced by the practicing raw fooders was the time factor involved in raw food preparation. It is endemic in our culture to feel pressed for time - to be always on the go, rushing from place to place and "grabbing a bite to eat" in the midst of the chaos. Of course nothing could be simpler than grabbing an apple, banana or bag of baby carrots and eating out of hand, but making raw pasta, sauces or patés may be perceived as too time consuming - especially when the preponderance of convenience foods, fast food outlets and advertising for these products and venues repeatedly reinforces the idea that there's not enough time in the day to prepare meals. Even if we don't eat fast food and packaged meals, we are subjected to the messages they convey.

I agree it is a fact that preparing food takes time. This means that unless you are in the position to eat out, order in or hire someone else to prepare all your wholesome fresh meals, you will have to slow down a couple of times a day to make wholesome, fresh food for yourself. By doing this, you get to take care of YOU. Love yourself in these moments, and pour your love into your creation. Taking care of yourself is a beautiful thing!

And how do you find the time? Here are a few pointers. Number One is to change your thoughts around time. WANT to have the time, BELIEVE you have the time, and start to regard your time in the kitchen as PLAY, not work. If you are having FUN in the kitchen, you will WANT to spend time there making yummy food!

Beyond that, it helps to think ahead. Think about what you want to eat for the coming day or week and be organized by making shopping lists, purchasing ingredients in advance, soaking nuts for cheeses or seeds for sprouts in time to make the dishes you want, etc. Also, try to choose a day or an afternoon that you're not working to prepare a few more complex items for the week ahead (Sunday works for me).

Another way to help save time (and increase the fun factor) is GADGETS! These are not necessary, but they do broaden the scope of culinary possibility. Not all gadgets are pricey - for instance, salad spinners are very modestly priced and well worth the small investment for the time they save washing greens (I use mine every day), not to mention the secret glee of spinning and braking the machine! A simple spiral slicer costs under $30 and makes the best zucchini spaghetti in the world, with a chewy bite like pasta, but with no gummy gooey slimy thing going on, no wheat to clog you up, and talk about fast food! Just cut a zuke in half, put it in the machine, turn the crank and out come perfect strands, like magic. Top with your choice of: pesto, raw alfredo, oil and tamari, or even organic bottled marinara sauce (remember, it's not necessarily about 100% raw) and you're in business!

It's easy to make kitchen time play time when you have toys to play with! I am having the most fun ever exploring the world of raw food cuisine now that I have a juicer, spiralizer and - last but not least - dehydrator (this WAS a big investment), which I finally bought after months of saving up and thoughtful deliberation over what kind to get (I went with a white, 9-tray Excalibur with timer - yes!). I made my first two trays of Maiden Bread on Sunday, with vidalia onions, veggie pulp, flaxseed and sunflower seed meal, based on Matt Amsden's Rawvolution recipe. Amazing!

Of course, I needed to create a spread for this savory creation, so I also made (on Sunday - told you it works for me) the most amazing Pumpkin Seed-Macadamia-Pine Nut Cheese with Fresh Garlic Scapes* you could dream of. It's so dreamy, I should call it Dream Cheese. I can't get over how super quick and easy it is to make DELICIOUS, CREAMY cheese out of seeds and nuts - non-dairy cheese that tastes as good if not WAY better than goat cheese or boursin. All you need is a food processor, and enough forethought to start soaking your seeds a few hours in advance. Look how beautiful:


This recipe is based on Cheese with Spring Onions, posted by Zoe on goneraw.com. (http://goneraw.com/recipes/1619-Cheese-with-Spring-Onions)

Pumpkin Seed-Macadamia-Pine Nut Cheese Balls with Garlic Scapes

2 cups pumpkin seeds (soaked for 2-4 hours and drained)
1/2 cup pine nuts
1/2 cup macadamia nuts
2 lemons' juice
1/3 cup olive oil
drizzle of black truffle oil (optional)
1/2 to 1 Tablespoon Himalayan pink salt
10 garlic scapes, chopped (plus additional minced scapes for rolling) (may substitute chives or green onions for scapes)

Directions: Put soaked seeds and nuts in food processor and pulse/process to fine meal texture. Add lemon juice and olive oil and process until smooth, stopping to scrape down sides with spatula as needed. Add truffle oil and 1/2 Tablespoon salt, and continue to process for a while (up to 10 minutes altogether). If it's not coming together, add a little water to obtain desired texture - it should be very thick yet creamy. Taste and adjust salt if you want. When cheese seems done, add in chopped garlic scapes and process briefly to break down and blend well. Refrigerate for 30 minutes, then remove, form balls and roll in minced garlic scapes (the balls, not you!). Or just store cheese in glass containers to use as spread. (I did both.) Keeps in fridge five days.


*Garlic scapes are the curly, upper sections of garlic plants. Scapes develop in mid to late June in my area, and sport a closed bud at their tip. If the scape is not removed, the bud will swell open into a round, edible flower and the garlic bulb will not develop. Scapes are trimmed away to help the plant send its energy down into the root instead of up into the flower, so that a nice, fat garlic bulb will grow for harvest later in the season. Garlic scapes are pungent, tender and tasty - a real Summer Solstice time, seasonal treat!